How to Build a Python Package?
Are you interested in knowing how to build a python package?
Have you or your software development teams created useful a Python module that others could find helpful? Share them with the larger Python developers’ community by creating Python packages.
However, if you have never done this before then you will first need a good tutorial on how to build a Python package.
Take the following steps to build a Python package:
1. Review a few popular Python packages on PyPI (Python Package Index)
Python is well-known. The TIOBE index consistently ranks this open-source programming language as one of the most popular languages.
Python is a versatile language. Organizations hire Python developers for a wide range of projects like web development, data science, artificial intelligence (AI) development, etc.
Developers have built useful Python packages, which significantly contribute to Python's popularity. You can find these packages easily on the Python Package Index, i.e., PyPI.org.
Data scientists can use the following Python packages:
- TensorFlow;
- NumPy;
- SciPy;
- Matplotlib;
- Pandas;
- Keras;
- SciKit-Learn;
- Statsmodels.
AI/ML developers can use the following Python packages:
- NumPy;
- SciPy;
- Scikit-Learn;
- Theano;
- TensorFlow;
- Keras;
- PyTorch;
- Pandas.
We recommend you review some of these packages. You can get practical ideas about many aspects, e.g.:
- The quality of code in popular Python packages;
- How you should write Python code comments;
- The quality of Python package documentation;
- Installation instructions on different operating systems like Windows, Linux, etc.;
- How you should document the README file of your package.
2. Code, review, and test your new package
You have an idea for creating some reusable Python code, and that’s excellent! Create the code for sharing with others. Follow the up-to-date Python packaging guidelines. These cover key aspects, e.g.:
- Distro-wide guidelines;
- Naming conventions;
- Dependencies and other requirements;
- Guidelines for testing the package;
- Guidelines for using mandatory macros.
Ensure a thorough review of your code. Engage expert code reviewers since thousands of developers will use your Python package. Reviewers should pay special attention to application security vulnerabilities. They should also review the sub-packages.
Test your code diligently. Finally, we recommend you use a robust source-control tool like GitHub. Read GitHub guides to learn how to create a repository, how to commit your code, etc.
3. Decide about APIs and plan how programmers will use the package
Decide how developers will use your new package. You should make your package easy to import. Take the following steps:

Get a complimentary discovery call and a free ballpark estimate for your project
Trusted by 100x of startups and companies like
A. Categorize methods as public or private
Developers will use several functions and methods in a package. However, some functions and methods will have internal use only.
You need to explicitly indicate which methods and functions are for the use of programmers. Similarly, you need to identify the functions and methods for internal use.
Use “def_private_function ()” to identify the private methods and functions. Do this for all functions for internal use.
B. Add an “__init__.py” file
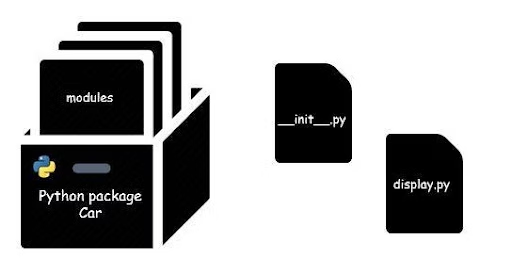
You might have several modules in your package. Accordingly, you will have several Python files. Each of them will correspond to different modules.
Create a folder for your new package, and give it a suitable name. Add the Python files there. Add another file, and name it the “__init__.py” file. It’s an important file in a Python package directory structure.
This ensures that Python considers the “your_package” directory as a Python package. Your code will look like the following code now:
“
Your_package
|--__init__.py
|--modulex.py
|--moduley.py
“
Note: The “__init__.py” file can be empty.
4. Document your Python package
Great documentation makes it easier for developers to use a Python package. You should explain how your code works. Add the following types of documentation:
A. Docstrings
You need to provide a docstring for each of the functions in your new package. Docstrings describe the function in detail. Include the following in them:
- Summary: This section should explain the function. Use simple language and avoid jargon.
- Parameters: A function typically needs input values for different parameters. There can be different types of parameters. Describe all of them.
- Output: Many people refer to it as the “return value”. It refers to the values returned by the function.
- Example: You should create a simple example to demonstrate the working of a function. Provide code snippets in the example.
B. The “README.md” file
Provide a README.me file. It contains a summary description of a Python package. We recommend you place this in the top directory of your package. This way, GitHub displays this as the first page to programmers browsing your package.
You should create these files using a format known as MarkDown. This is why these files have an extension called “md” in their name.
A “README.md” file should provide an overview of the package. It should contain installation instructions. Provide a few examples to explain how to use the package.
5. Attach a license to your Python package
You make your code public by creating a Python package. Therefore, you need to specify a license. The licensing information in your package describes how programmers should use it.
You will likely use an MIT license since you are creating an open-source package. The other option is an Apache 2.0 license. You can choose a license easily if you use GitHub. The tool guides you sufficiently.
6. Create a “setup.py” file
You now need to create a “setup.py” file. This file helps you to create an installable Python package. It contains the information required by the Python installer at the time of installing a package.
You can create this file by copying and pasting information from other “setup.py” files. The following are some of the key information in a Python setup file:
- “Setuptools” information;
- Package name;
- Package version;
- Author name;
- Author email;
- URL of the package;
- Description;
- Long description.
Dependencies for the “install package” process.
A Python “setup.py” file looks like the following:
“
Import pathlib
From setuptools import setup, find packages
HERE = pathlib.Path(__file__).parent
VERSION = ‘0.1.0’
PACKAGE_NAME = ‘the name of the package’
AUTHOR = ‘the name of the author’
AUTHOR_EMAIL = ‘the email address of the author’
URL = ‘the URL of the package’
LICENSE = ‘MIT license’
DESCRIPTION = ‘this is the description of the package’
LONG_DESCRIPTION = (HERE / “README.md”).read_text()
LONG_DESC_ TYPE = “text/markdown”
INSTALL_REQUIRES = [
‘scipy’
‘keras’
1,200 top developers
us since 2016
]
Setup(name = PACKAGE_NAME,
Version=VERSION,
Description=DESCRIPTION,
Long_description=LONG_DESCRIPTION,
Long_description_content_type=LONG_DESC_TYPE,
Author=AUTHOR,
License=LICENSE,
Author_email=AUTHOR_EMAIL,
url=URL,
install_requires=INSTALL_REQUIRES,
packages=find_packages()
)
Note: Regular Python files, i.e., “.py” files don’t have metadata information. Stack Overflow and other websites provide instructions to add attributes/metadata to the file object instance. Follow these instructions if you want to add metadata to your Python package.
7. Organize your files for packaging
Before you created the “setup.py” file, your package looked like the following:
“
The_package
|-- README.md
|-- LICENSE
|--__init__.py
|--modulex.py
|--moduley.py
“
After you create the “setup.py” file, you should rearrange it in the following way:
“
The_package
|--setup.py
|-- README.md
|-- LICENSE
|--the_package
|--__init__.py
|--modulex.py
|--moduley.py
“
8. Create a PyPI account
You need to create an account on the Python Package Index (PyPI). Visit the PyPI homepage. Follow the sign-up process to create a PyPI account. Secure your account information.
9. Run the required commands to create the necessary packages
You now need to build the packages that Python will require. This process involves creating a source distribution. You need to create a “wheel” too. “Wheels” are “.whl” files that make it easier to install Python packages.
Run the following command from the main directory of your Python package:
“
Python setup.py sdist bdist_wheel
“
This will create the source distribution and wheel files.
10. Test your package on TestPyPI
Test.PyPI.org is a separate instance of PyPI, i.e, Python Package Index. You can use this to try the distribution tools and processes. Uploading packages into TestPyPI doesn’t affect the real Python package index.
You need to create an account on TestPyPI. Uploading packages into this instance involves the same processes as PyPI. You can download packages from Test PyPI using the same commands you will use for PyPI.
You use Twine to upload packages into TestPyPI as well as PyPI. Open a command-line prompt.
Use the following command to install Twine:
“
pip install twine
“
Run the following command to upload a package into TestPyPI:
“
Twine upload -- repository testpypi dist/*
“
Execute the following command to download projects from TestPyPI:
“
Pip install –index-url “https://test.pypi.org/simple/<name-of-the-package>”
“
11. Deploy your Python package
You had earlier created the source distribution and wheel files. This process creates a few new directories, e.g.:
- “dist”;
- “build”;
- “package_name.eff-info”.
The “dist” directory has the installation files that you will deploy to PyPI. There are two files, which are as follows:
- A compressed “tar” file;
- A wheel file.
You now need to verify the distribution files. Do that by running the following command:
“
Twine check dist/*
“
You have already uploaded the new package to TestPyPI, and you had verified it there. Now, you can deploy the package to PyPI. Run the following command for this:
“
Twine upload dist/*
“
Congratulations! You have just built and deployed your Python package!
A few considerations when building a Python package
Keep the following considerations in mind when creating a Python package:
A. Classifiers
You need to provide a list of “trove classifiers” to PyPI. Categorize them by each release. Describe the target audience.
Explain the system requirements, and indicate the maturity level of the package. The “Classifiers” webpage on PyPI provides a list of classifiers and templates.
B. Use tools like the Python interpreter to expedite your project
Thankfully, the rich ecosystem of Python facilitates application development. You can use many tools. An example is the Python interpreter. It comes with Python installation, and you can invoke it easily. It works with “.py” as well as “.txt” files.
C. Use documentation from authoritative sources
You can find plenty of documentation on Python on the Internet. We recommend you use documentation from authoritative sources. An example is the Python Packaging Authority. It has published the Python Packaging User Guide, which is a comprehensive document.
D. Use best practices for Python development
Follow the established best practices for coding Python programs. E.g., you can use the PEP 8 style guide for Python code.
To take another example, you can use a config file. It helps you to specify configuration data to your program related to installation, debugging, etc.
E. Using the “MANIFEST.in” file smartly
Do you want to include files in source distributions or remove files from them? Write a “MANIFEST.in” file at the project root for this.
Final Thoughts on How to Build a Python Package
We explained how to build a Python package. Contact DevTeam.Space if you need help with projects. An account manager will explain our services and capabilities.
FAQs on How to Build a Python Package
DevTeam.Space has highly experienced developers with Python 3 expertise. Our developers have worked on a range of projects involving this programming language. We also have competent code reviewers that can review Python code and unearth key defects in code and configuration files, which helps project teams.
Our Python programmers have used Python in various projects. These include Artificial Intelligence (AI)/Machine Learning (ML), data science, and web development projects. Not only have they used important packages like NumPy but they have created packages for this open-source language.
DevTeam.Space developers know the best Python libraries for data science projects. They have extensive experience in key Python files and libraries like SciPy, Matplotlib, Scikit Learn, TensorFlow, Keras, Plotly, PyCaret, PyTorch, etc. They can fully support your data science project.


